Description
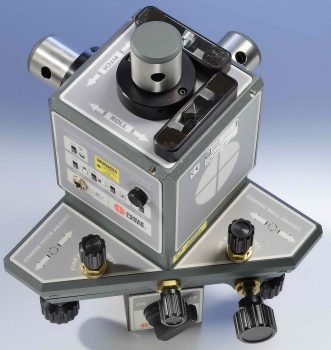
Designed primarily for high-accuracy flatness, straightness and squareness measurements of machine tools, the L-733 Precision Triple Scan® Laser has 3 auto-rotating laser planes, 3 vertical and 1 horizontal. All 3 laser planes are flat within 2.0 arc seconds (.00012 in./ft. or 0.010 mm/m) in a 360º sweep and 1.0 arc second in a 90º sweep. The top-to-side and top-to-rear laser planes are perpendicular within 2 arc second (.00012 in./ft. or 0.010 mm/m). The two side and rear laser planes are perpendicular to within 3 arc seconds. It also features 2-arc-second illuminated level vials.
The laser is mounted on an adjustable base with coarse pitch, roll and yaw adjustments, so that each laser plane can project the measurement reference out to 100 feet (30.5 m) in radius in all directions. The laser is completely self-contained and can operate on battery or AC power.
Since the L-733 has 3 laser planes, multiple machine axes can be aligned and measured at the same time. In addition, laser planes make formerly difficult alignment measurements, like roll in horizontal and vertical machine axes, a very easy process.
The laser can project the measurement reference out to 100 feet (30.5 meters) in radius for each laser plane, so surfaces up to 200 feet (61 meters) can be measured in 1 setup.
Applications
- For alignments with tolerances of .00012 in./ft. or 0.010 mm/m or greater
- Measuring and aligning:
- The flatness and straightness of almost any surface (squares, frames, ways, flanges, circles, etc.)
- Leveling almost any surface (squares, frames, ways, flanges, circles, etc.)
- The flatness and straightness of horizontal and vertical surfaces
- The straightness of horizontally and vertically traversing axes of machine tools
- The squareness of vertical to horizontal surfaces, up to 100 feet (30.5 m) long
- The squareness of 2 vertical surface, up to 100 feet (30.5 m) long
- The parallelism of vertical or horizontal surfaces
- Checking plumb of a vertical surface up to 100 feet (30.5 m) long
- Checking machine tool guideway twist and parallelism between guideways
- Measuring surfaces up to 200 feet (61 meters) long with 1 setup
- Roll forming machines
- Water-jet cutting machines
- Precision laser-cutting machines
- Lower-accuracy machine tool alignment, such as:
- Horizontal boring mills and machining centers
- Vertical boring mills and machining centers
- Gantries
- Vertical turning lathes (VTLs)
- Automotive transfer-line wing bases
- Injection molding machines and presses
- Aircraft assembly (seat track alignment, setting water, butt and station planes, wing-to-body and body-to-body join alignment, etc.)
- Roll alignment:
- Printing presses
- Film lines
Features
- Two continuously rotating laser planes (1 horizontal and 1 vertical) with operational range of 100 feet (30.5 m) in radius.
- High accuracy: laser planes flat to 2.0 arc seconds (.00012 in./ft. or 0.010 mm/m) in a 360º sweep and 0.25 arc seconds in a 90º sweep
- Planes are mutually square with an accuracy of up to 2 arc secs (.00012 in./ft. or 0.010 mm/m).
- Includes Pitch/Roll/Yaw adjustment base with coarse and fine adjustments.
- Standard illuminated levels accurate to 3 arc second (.00018 in./ft. or 0.015 mm/m)
- Optional L-740SP high-accuracy, split-prism level assemblies accurate to 1 arc second (.00006 in/ft. or 0.005 mm/m)
- Uses A-1519-2.4ZB Single-Axis, Wireless Targets – 1.2 in (33 mm) PSD, .00002 in (0.0005 mm) resolution.
- Wireless targets provide real-time alignment data updating simultaneously
- Align and monitor multiple axes simultaneously using up to 99 targets at the same time
- Usually 1-2 setups per machine
- Setups typically take 10-20 minutes or less
- Short warm-up
- Optional Windows Win7/8/10 software for quickly recording and analyzing machine geometry data
- Battery or AC powered
- Laser and targets fit into portable shipping case
Specifications
L-123 Base: 4.8 lbs (2.2 kg)
Battery Pack: 2lb (0.9 kg)
L-123 Base: Aluminum
.160 in. (4.06mm) beam diameter
<1 arcsec: .00006 in./ft. (0.005 mm/m) in a 90º sweep
± .00015 in. (0.0038 mm) in a 90º sweep
Top-to-rear: within 2 arcs ecs (.00012 in./ft. or 0.01 mm/m)
Rear-to-side laser plane: within 3 arc second (.00018 in./ft. or 0.015 mm/m)
Optional M-124-Lipo 10,000 mAh LiPo Rechargeable Battery Pack
Optional Replaceable 9V Battery Pack
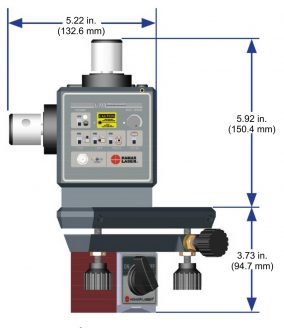
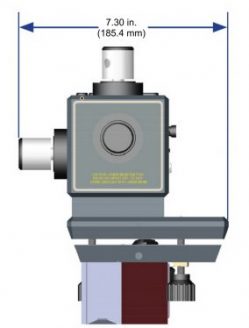
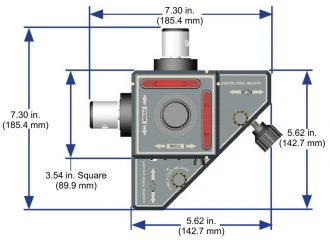
Drawings


- Call Us: +1-203-730-4600
- Email: sales@hamarlaser.com
- Website: www.hamarlaser.com


