Description
The T-261A 4-Axis target displays horizontal and vertical centering and angular (pitch and yaw) data simultaneously and provides real-time information to a live graphic display in our Lathe9 Software or to 2 R-1307C 2-Axis Readouts. This enables the user to make alignment adjustments to the machine and watch the alignment values update as they are made.
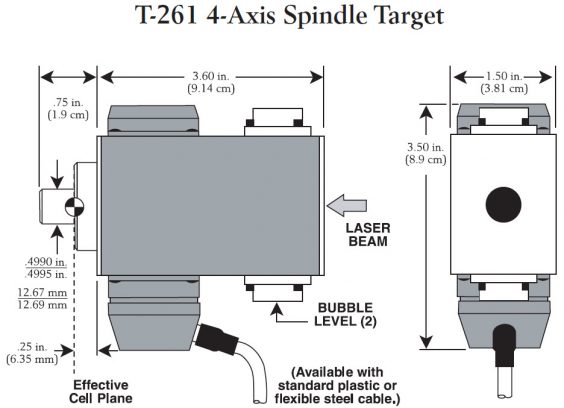
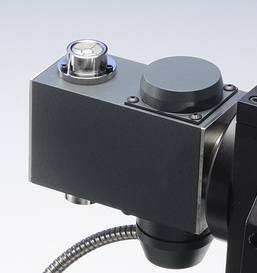
Two bullseye levels on the top and bottom of the T-261A provide accuracy in rotational positioning for our NORMin procedure. The target’s .4995 in. (12.687 mm) diameter mounting stud simplifies fixture design and building. The stud can be easily removed and replaced with a custom mounting stud or fixture. A .5000 in. (12.700 mm) hole reamed square to a face is all that is needed to mount the target.
When used with the R-358, the T-261A has a center resolution of .00001 in. (0.00025 mm) and angular .00001 in/ft (0.0008 mm/m). When used with Hamar Laser’s alignment software, our NORMin procedure compensates for mounting and other errors for even greater accuracy.
Applications
- Aerospace Tooling/Fixturing
- Boring Mill Spindle-to-Part Alignment
- Clevis bearings in aerospace hinge lines
- Lathe Alignment
- Printing Press Side Frames
- Rotary-Dial Machine Spindle Alignment
- Spindle-to-Subspindle Alignment on Multi-Axis Turning Centers
- Transfer-Line Spindle Alignment
Features
- 4 simultaneously updating alignment axes:
- Vertical Center
- Vertical Angle
- Horizontal Center
- Horizontal Angle
- Hardened .4995 in. (12.69 mm) mounting stud for easy clamping in spindles
- ±.050 in. (1.27 mm) center measuring range
- ±0.5 degrees angle measuring range
- .00001 in. (0.00025 mm) resolution with R-358 Computer Interface
- Rugged aluminum housing for any machine shop environment
- 10 ft. (3 m) rugged steel cable
Specifications
Case: Aluminum
Connector: 15-pin D Connector
Angular: .00001 in/ft (0.0008 mm/m)
Angular: ± 0.5 deg.
Outside ± .025 in. (0.64 mm): linearity is <5%
Drawings

- Call Us: +1-203-730-4600
- Email: sales@hamarlaser.com
- Website: www.hamarlaser.com


